需求说明
公司微服务,为了在出现5xx状态码或特殊4xx状态码的时候,快速定位问题和解决问题,决定在nginx访问日志中加入错误请求的的响应(response)信息。经过调研和充分测试后决定使用openresty来实现,这里记录下实现方法。
openresty 简介
OpenResty® 是一个基于 Nginx 与 Lua 的高性能 Web 平台,其内部集成了大量精良的 Lua 库、第三方模块以及大多数的依赖项。用于方便地搭建能够处理超高并发、扩展性极高的动态 Web 应用、Web 服务和动态网关。
openresty安装
环境说明:
操作系统:centos 7.2
openresty:openresty-1.13.6.1
1、安装依赖环境
yum install readline-devel pcre-devel openssl-devel perl c++ gcc gcc-c++ systemtap-sdt-devel -y
2、下载解压openresty
wget https://openresty.org/download/openresty-1.13.6.1.tar.gz
tar -xvf openresty-1.13.6.1.tar.gz -C /usr/local/
3、下载解压依赖模块
wget https://codeload.github.com/FRiCKLE/ngx_cache_purge/zip/master  -P ngx_cache_purge.zip
unzip ngx_cache_purge.zip -d /usr/local/openresty-1.13.6.1/bundle/
wget https://ftp.pcre.org/pub/pcre/pcre-8.38.tar.gz
tar -xvf pcre-8.38.tar.gz -C  /usr/local/openresty-1.13.6.1/bundle/
wget https://github.com/FRiCKLE/ngx_cache_purge/archive/2.3.tar.gz
tar -xvf 2.3.tar.gz  -C /usr/local/openresty-1.13.6.1/bundle/
wget https://www.openssl.org/source/openssl-1.1.0g.tar.gz
tar xf openssl-1.1.0g.tar.gz -C /usr/local/openresty-1.13.6.1/bundle/
4、编译安装
./configure --user=nginx --group=nginx --with-pcre=./bundle/pcre-8.38 --with-stream --with-stream_ssl_module --with-http_v2_module --without-mail_pop3_module --without-mail_imap_module --without-mail_smtp_module --with-http_stub_status_module --with-http_realip_module --with-http_addition_module --with-http_auth_request_module --with-http_secure_link_module --with-http_random_index_module --with-http_gzip_static_module --with-http_sub_module --with-http_dav_module --with-http_flv_module --with-http_mp4_module --with-http_gunzip_module --with-threads --with-file-aio --with-dtrace-probes --with-stream --with-stream --with-stream_ssl_module --with-http_ssl_module --add-module=./bundle/ngx_cache_purge-2.3/
gmake
gmake install
5、openresty安装完成后目录结构如下
[root@c7-node1 ~]# ll /usr/local/openresty
总用量 244
drwxr-xr-x.  2 root root    123 4月   2 17:20 bin
-rw-r--r--.  1 root root  22924 4月   2 17:20 COPYRIGHT
drwxr-xr-x.  6 root root     56 4月   2 17:20 luajit
drwxr-xr-x.  6 root root     70 4月   2 17:20 lualib
drwxr-xr-x. 12 root root    165 4月   2 17:22 nginx
drwxr-xr-x. 44 root root   4096 4月   2 17:20 pod
-rw-r--r--.  1 root root 218352 4月   2 17:20 resty.index
drwxr-xr-x.  5 root root     47 4月   2 17:20 site
测试
安装完成之后,我们来验证下openresty能否正常解析lua代码。
1、修改nginx配置文件
# cd /usr/local/openresty
# vim nginx/conf/nginx.conf
将nginx默认配置的location修改为如下内容
        location / {
                default_type 'text/html';
                content_by_lua 'ngx.say("hello world")';
        }
2、测试配置,并启动
# ./bin/openresty -t
nginx: the configuration file /usr/local/openresty/nginx/conf/nginx.conf syntax is ok
nginx: configuration file /usr/local/openresty/nginx/conf/nginx.conf test is successful
# ./bin/openresty
3、访问测试,用浏览器访问服务器的ip地址,如果出现如下内容,说明环境安装是没问题的

openresty 开启 response日志功能
1、修改nginx log格式
# vim nginx/conf/nginx.conf
    log_format main  escape=json '{ "@timestamp": "$time_local", '
                         '"remote_addr": "$remote_addr", '
                         '"upstream_addr": "$upstream_addr",'
                         '"remote_user": "$remote_user", '
                         '"body_bytes_sent": "$body_bytes_sent", '
                         '"request_time": "$request_time", '
                         '"status": "$status", '
                         '"request": "$request", '
                         '"request_method": "$request_method", '
                         '"http_referrer": "$http_referer", '
                         '"body_bytes_sent":"$body_bytes_sent", '
                         '"http_x_forwarded_for": "$http_x_forwarded_for", '
                         '"host":""$host",'
                         '"remote_addr":""$remote_addr",'
                         '"http_user_agent": "$http_user_agent",'
                         '"http_uri": "$uri",'
                         '"req_body":"$resp_body",'
                         '"http_host":"$http_host" }'
2、nginxc增加一个server配置段,注意配置文件中的目录需要自己创建,文章省略了此步骤,我代理的服务器是我们公司一个测试服务器的地址,你可以任意代理,只要能模拟出2xx和4xx、5xx状态码即可。
# vim nginx/conf/conf.d/test.conf
server{
    listen 8041;
    access_log  /data/logs/nginx/test.log  main;
			# lua代码
                        set $resp_body "";
                        body_filter_by_lua '
	                # 最大截取500字节返回体
                        local resp_body = string.sub(ngx.arg[1], 1, 500)
                        ngx.ctx.buffered = (ngx.ctx.buffered or"") .. resp_body
					# 判断response是否不为空,并且状态码大于400
                        if ngx.arg[2] and ngx.status >= 400  then
                                ngx.var.resp_body = ngx.ctx.buffered
                        end
                  ';

    location / {
         proxy_pass http://test;
    }
}
upstream test {
     server 10.1.13.105:8041  max_fails=2 fail_timeout=6s;
}
3、测试配置,并重载openresty配置
[root@c7-node1 openresty]# ./bin/openresty -t
nginx: the configuration file /usr/local/openresty/nginx/conf/nginx.conf syntax is ok
nginx: configuration file /usr/local/openresty/nginx/conf/nginx.conf test is successful
[root@c7-node1 openresty]# ./bin/openresty
4、访问测试,并观察日志
先来一个200请求,观察访问日志
此时看我们nginx的访问日志req_body 字段是没有数据记录。
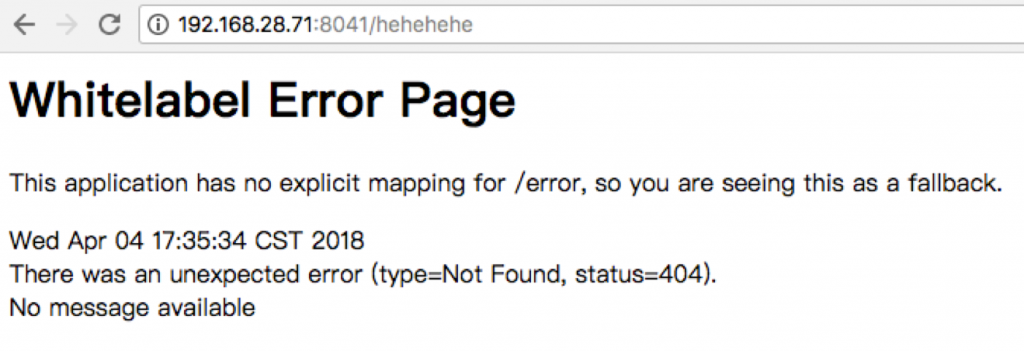
我们在来一个404请求,观察是否会记录response信息
此时看我们nginx的访问日志req_body 字段,response信息被完整的记录下来,说明我们的配置是成功的
后续
到此我们的nginx访问日志记录response信息的配置就完成了,这样以后每天在ELK中检索日志,只需要通过kibana过滤出所有5xx的状态码,就可以第一时间看到服务器响应给客户端的错误内容,方便运维和开发人员快速解决问题。
转载请注明:西门飞冰的博客 » openresty 实现记录http response


